How do I load images from a file?
The method for loading images saved in files varies depending on the canvas creation status.
Please check the following for your applicable situation.
Importing to a newly created canvas
1. Select File menu > Open.
2. Select the image you want to open and click Open.
The file app that opens varies depending on the device.
3. A canvas with the image loaded is created.
Importing an image
1. Select File menu > Import > Image.
2. The Open dialog box opens. Select the image to import.
The file app that opens varies depending on the device.
3. An image layer will be created.
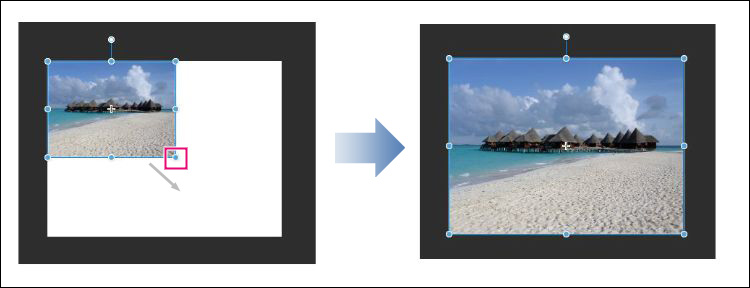
You can move, transform, and rotate the image by adjusting the handles and control points.
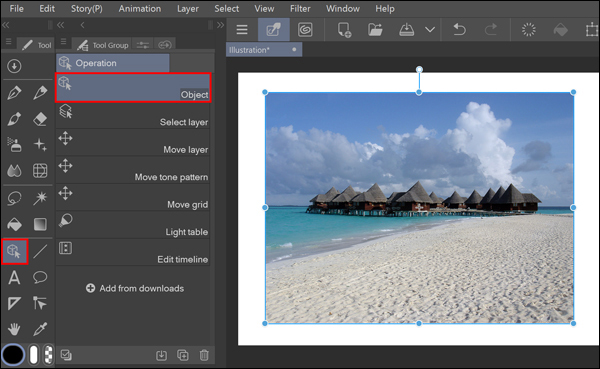
If handles are not visible
With the target layer selected, choose Manipulation tool > Object tool to display the handles.
When you want to draw directly on the loaded image
Please rasterize the image layer.
Right-click the image layer and select Rasterize.
When loaded in black and white or tone state
When the canvas's base color is set to monochrome, the image is loaded in tone mode.
You can turn this off by clicking Layer Property > Effect > Tone.
Tablet/Smartphone: In Simple Mode
Press the ... icon in the Layers palette to load images or photos saved on your tablet or smartphone.
For detailed instructions, please refer to the following page.
People who read this FAQ also viewed the below articles.